2019.04.17
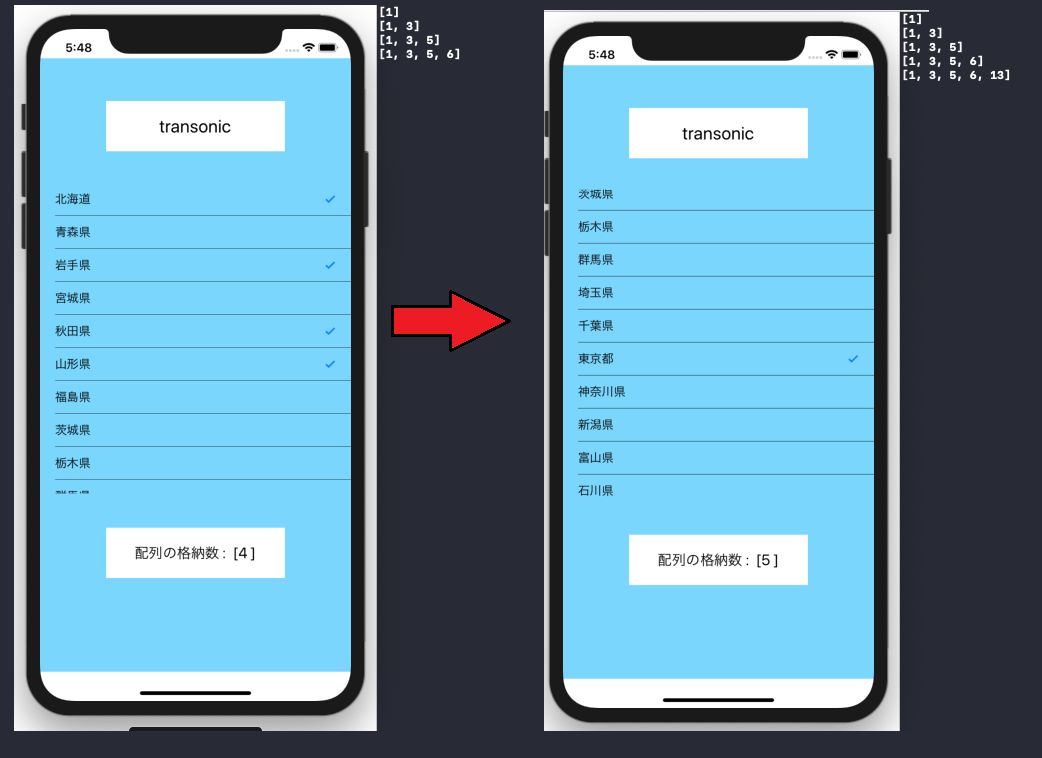
TableViewでセルを複数選択し、もう一度選セルを選択すると選択状態が解除される方法を説明します。
また、画面をスクロールするとチェックマークが外れてしまいますのでその対処法も説明します。
環境 [xcode 10.2:swift 5.0]
まずは今回実装したコード全体を記述します。
(TableViewのベースは以前の記事のものを使用しておりますので、よろしければ参照してください。)
1 2 3 4 5 6 7 8 9 10 11 12 13 14 15 16 17 18 19 20 21 22 23 24 25 26 27 28 29 30 31 32 33 34 35 36 37 38 39 40 41 42 43 44 45 46 47 48 49 50 51 52 53 54 55 56 57 58 59 60 61 62 63 64 65 66 67 68 | import UIKit class ViewController: UIViewController,UITableViewDelegate,UITableViewDataSource { var rowListArray = [Int]() var itemListArray = [Int]() var sortArray = [Int]() @IBOutlet weak var label: UILabel! @IBOutlet weak var tableView: UITableView! let items = ["北海道", "青森県", "岩手県", "宮城県", "秋田県", "山形県", "福島県", "茨城県", "栃木県", "群馬県", "埼玉県", "千葉県", "東京都", "神奈川県", "新潟県", "富山県", "石川県", "福井県", "山梨県", "長野県", "岐阜県", "静岡県", "愛知県", "三重県", "滋賀県", "京都府", "大阪府", "兵庫県", "奈良県", "和歌山県", "鳥取県", "島根県", "岡山県", "広島県", "山口県", "徳島県", "香川県", "愛媛県", "高知県", "福岡県", "佐賀県", "長崎県", "熊本県", "大分県", "宮崎県", "鹿児島県", "沖縄県"] override func viewDidLoad() { super.viewDidLoad() self.tableView.dataSource = self self.tableView.delegate = self // 複数選択を有効にする tableView.allowsMultipleSelectionDuringEditing = true } // 必須メソッド_行数の設定 func tableView(_ tableView: UITableView, numberOfRowsInSection section: Int) -> Int{ return items.count } // 必須メソッド_埋め込むセルの値を設定 func tableView(_ tableView: UITableView, cellForRowAt indexPath: IndexPath) -> UITableViewCell{ let cell = UITableViewCell() cell.backgroundColor = UIColor.clear cell.textLabel?.text = items[indexPath.row] // セルの選択時の背景色を消す cell.selectionStyle = UITableViewCell.SelectionStyle.none // セルの選択状況の判定 if (rowListArray.contains(indexPath.row)){ cell.accessoryType = .checkmark }else{ cell.accessoryType = .none } return cell } // 選択時のの動作 func tableView(_ tableView: UITableView, didSelectRowAt indexPath: IndexPath){ let cell = tableView.cellForRow(at: indexPath) // 選択したセルにチェックマークが無い場合 if(cell?.accessoryType == UITableViewCell.AccessoryType.none){ cell?.accessoryType = .checkmark self.rowListArray.append(indexPath.row) }else{ // 選択したセルにチェックマークがある場合 cell?.accessoryType = .none let listNumber = rowListArray.filter ({ (n:Int) -> Bool in if n != indexPath.row{ return true }else{ return false }}) rowListArray = listNumber } label.text = "配列の格納数 : [(String(rowListArray.count)) ]" // 配列を昇順で並び替え、 // 都道府県コードに変換する。 sortArray = rowListArray.sorted{$0 < $1} itemListArray = sortArray.map{$0 + 1} print(itemListArray) } } |
上記のコードについての説明をしていきます。
まず、行番号を格納するための配列”rowListArray”を宣言します。そして複数選択を許可するため
1 | tableView.allowsMultipleSelectionDuringEditing = true |
を記述します。これによりTableViewで複数選択が可能になりました。
しかし、このままでは選択の解除や選択状態の維持できませんので対策をしていきます。
セル選択時のメソッド”didSelectRowAt”でセルの選択状態を判定し、 選択されていなければindexPath.rowを配列に追加、選択されていた場合は解除し配列から削除します。 今回は選択時にチェックマークを表示させるようにしましたので、チェックマークの有無で判定していきます。
1 | if(cell?.accessoryType == UITableViewCell.AccessoryType.none) |
選択されていない場合は、チェックマークをつけ、”append”によって配列にindexPath.rowを追加します。
1 2 | cell?.accessoryType = .checkmark self.rowListArray.append(indexPath.row) |
すでに選択されていた場合は、チェックマークを外し、”filter”によって配列に格納されたindexPath.rowを削除します。
1 2 3 4 5 6 7 8 | cell?.accessoryType = .none let listNumber = rowListArray.filter ({ (n:Int) -> Bool in if n != indexPath.row{ return true }else{ return false }}) rowListArray = listNumber |
”listNumber”は”rowListArray”のfilter操作の仮置き場とし、操作が終わったら”rowListArray”に配列を入れ直します。
以上で選択された行番号が配列に格納されましたので、この配列を使ってセルの選択状態を設定していきます。 セルの表示は”cellForRowAt”で処理されますので、配列と同じ行番号であるか判定しセルにはチェックをいれるように設定していきます。
1 2 3 4 5 | if (rowListArray.contains(indexPath.row)){ cell.accessoryType = .checkmark }else{ cell.accessoryType = .none } |
以上で、複数選択と解除また、選択状態の維持が実装できました。
※追記、swiftの配列操作では”filter”以外にも便利な機能がいろいろと用意されてあります。その中で今回は、”sorted”による配列の並び替えと”map”による格納された値への操作を実装しました。
1 2 | sortArray = rowListArray.sorted{$0 < $1} itemListArray = sortArray.map{$0 + 1} |
”sorted”では{$0 < $1}とすることによって昇順に並び替えができます。 ”map”では{$0 + 1}とすることによって格納された値全てに+1できます。これにより配列に格納された行番号を都道府県コードに変更することができます。
